Sunday, May 29, 2022

The Great Cover-Up

Hello friends.  Playing along with Papertrey Ink's The Great Cover-Up Challenge where they are looking for PATRIOTIC cards.  Very fitting on this day that we honor those who have passed on before us, and especially those who have sacrificed their lives for our freedoms.  


I think we all turn to RED, WHITE & BLUE when we hear the word patriotic, so I pulled out some Pure Poppy and Dark Indigo Pattern Pack DSP, and then started going through my PTI stash to see what I had that would work.  I sure have an awful lot of florals, but not much that would work for a patriotic card (probably because I don't tend to send out Memorial Day or 4th of July cards!).  After a deep search I ran across the QUILTED series and started thinking what's more American than a good old-fashioned quilt?!!  And that's how my quick and easy 4 x 4 card came together.  Take a look...


I used the QUILTED: SUMMER die to cut out all the pieces from the polka dotted, striped, & plaid papers, and then inlaid them back into the white frame that was mounted to a piece of Pure Poppy cardstock.  


Because this pattern looks like a pinwheel to me, I cut a 1" square from the polka dotted dsp, and cut from each corner to the center of the square and then folded over to create a mini pinwheel to adhere to the center of the card...a red enamel dot glued to the center finished off this simple little card!

I do have a TWOFER for you today, because when looking through my stash, I found another set I hadn't used in a loooooooong time, and it fit the RED, WHITE, & BLUE theme.  Not necessarily PATRIOTIC though, unless maybe you're thinking the boat could be part of the US Navy!  Probably not!!  But it still turned out cute and will work great for a masculine birthday card which I never seem to have enough of!!  Take a look...


 Pretty simple, but kinda cute, right?!  I used PTI's What The Doodle: Waves stamp set, along with the largest of the Pierced Feature Frame Dies.  I did die cut 3 boats and 3 waves to stack for dimension, and they pop quite nicely on the card.  The background is a NBUS Pinpoint Burst Plate die from Memory Box, that I've had for ages and ages, and finally remembered to use!!  (Aren't you proud of me for finally remembering to use it Darnell??!!)  I'll be sending this card over to the NBUS Challenge #38.


There is still a couple days to play along with The Great Cover Up Challenge, so check it out and play along for a chance at a $25 gift certificate.  
 

Thanks for stopping by today ... I love it when you do!


Tuesday, May 24, 2022

Double D - Monochromatic

Hello friends.  Playing along with the Double D Challenge today where they are looking for cards that are MONOCHROMATIC...cards made with shades of ONE color.


I decided to go with the color green using a technique that Jennifer McGuire showed HERE (Adding Texture Without Bulk), and came up with this card...


I started by die cutting the BotaniCuts: Palm Leaves (The Greetery) in different shades of green cardstock scraps, and then glued them randomly on a piece of white cardstock.  Next I covered this layer with MB's Pinpoint Leaf Plate Die and ran it through my die cut machine which adds another layer of design over the die cut Palm leaves.  Here's a closer up so you can see the design better...


Isn't that such a cool look?!  I'm hooked!!  Not only does the cover plate die leave the design impressed into the cardstock, but it impresses the die cut leaves firmly into the cardstock too!  I finished this card by matting it with a layer of black and a white card base, and then added my die cut sentiment from Honey Bee's Bitty Buzzwords stamps and dies.  I also added a few gold metallic pearls from PFS.

I have a 2nd card to share with you that isn't monochromatic, but uses the same technique of adding texture without bulk.  Take a look...


 This card was done exactly the same way as the first card, but used 2 oak leaf dies from Gina Marie Designs and some more cardstock scraps.  I used the same MB Pinpoint Leaf Plate Die and a different sentiment from the same Honey Bee Bitty Buzzwords stamp and die set, and silver metallic pearls for this card.  Fun, FUN technique and definitely worth checking out!

There's still time to play along with this MONOCHROMATIC challenge (HERE), so check out all the fabulous inspiration from the talented DT, and then join in!! 

Thanks for stopping by today ... I love it when you do!


Friday, May 20, 2022

Four Seasons Spring Challenge - May 2022

Hello friends.  Today I'm playing along with the Four Seasons SPRING Challenge where they are celebrating all things SPRING!


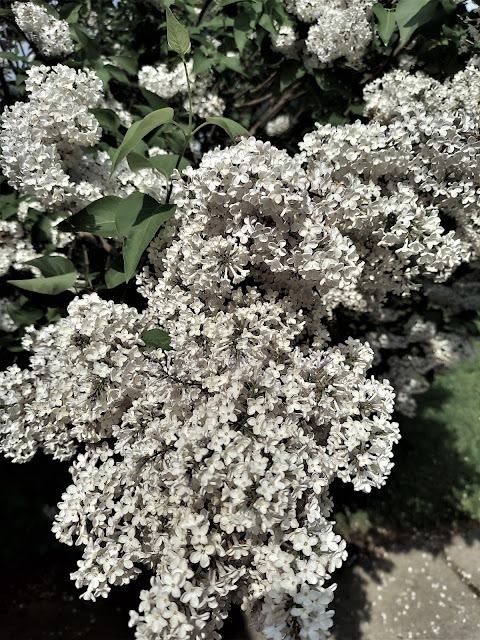
I grew up thinking of Spring as Lilac season because of the row of Lilac bushes my mom had right outside our dining room windows, and I can still vividly remember that heavenly smell!  Of course I had to plant one of my own when I got married, but that first one never survived.  About 10 years ago I decided to try again, and the first couple years as it was getting established, I only had a few blooms on it each year, but was excited to think of the coming years as it grew!  I live in Michigan, and Spring weather can be very unpredictable, especially where we get a week of warmer temperatures where things start to bud, and then it snows again and kills the buds...grrrrr!  Well anyway, that's what Spring has been for the last 5 or 6 years, so needless to say my Lilac bush has not given me many pretty blooms.  Until this year!!  


They look more white than purple, but that's just my photography skills!  My bush is just loaded this year and I couldn't be happier!!


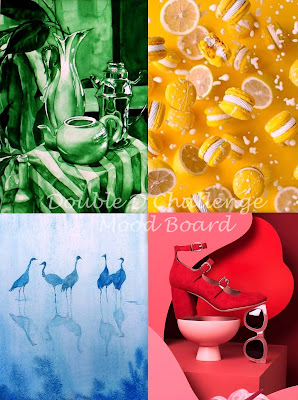
Can you smell them??  I can!!  Well of course after seeing the mood board for this challenge, and my own beautiful bush this year, I HAD to make a Lilac card!!  I used an older red rubber stamp from Impression Obsession (H8731) and came up with this Lilac card:


I stamped my image in black Versafine Onyx ink and then then clear heat embossed before coloring with several of my Copics.


I added my image to a die cut Postal Frame (The Greetery) in Highland Heather cardstock (SU!), and then added foam strips to the back before adding it to my white card base that I had used a MB Pinpoint Leaf Plate die on.


I finished my card with some sparkly white ribbon (SU!), silver cord, a small die cut heart (PTI's Tiny Tags), and a few Disco Ball sequins from Gina K.  In my head I could smell Lilacs the whole time I was making this card!!  :0)

There are LOTS of beautiful cards from the DT (and already in the gallery!) depicting SPRING, and you can check it all out right HERE to gaze (and smell!!) what SPRING is all about.  You can also play along with your own SPRING card until the 25th of this month. 

Thanks for stopping by today ... I love it when you do!


Monday, May 16, 2022

Color Hues Challenge #41 - RED & AQUA

Hello friends.  I am honored to be Guest Designing with the team over at the Color Hues Challenge and this week we are looking for cards with RED and AQUA.


I have always loved using this color combo for Christmas cards, but since the weather here in my "neck of the woods" has turned a bit warmer finally, I decided to work on my dwindling birthday card stash using a fun die set from Spellbinder's that my sweet friend Birgit shared with me called Serve-A-Slice.  Take a look...


Now doesn't a slice of warm cherry pie make you think of warm Summer days?!!  Birgit sent all the pieces for the pie slice and plate in white cardstock, and I ink blended with kraft and red inks to create this yummy piece of pie.  My background was done with PFS's Diamond Plaid Stencil, and Ocean Mist ink from Gina K.  


My sentiment comes from The Greetery's Sweet Tooth stamp & die set, and my frame is from PFS's Stitched Scallop Rectangle Dies.  I finished off this sweet card with a bit of glitter and a few Disco Ball sequins (Gina K).

I have a twofer for you today, because I LOVE this color combination and I really am trying to ramp up my sadly depleted birthday stash.  I have made similar cards to this one and posted on my Instagram account (#marciahill9304) using different colors, but it turned out pretty cool with the red & aqua color combo too!


 This card uses MFT's Happy Cake Day and Recipe For Happiness stamps and dies, and the background is from The Stamp Market - Pierced Plaid (Thanks Michele!!).  


All my cake layers and "HAPPY" letters and sprinkles were ink blended with Fired Brick and Peacock Feather Distress inks, and I finished off the "HAPPY with some Glossy Accents, and a bit of WOS on the sprinkles.  

So there you have two cards using the RED and AQUA color combo, and we can't wait to see what YOU come up with using these two colors!  Check out all the inspiration from the talented DT and then play along right HERE.  


Thanks for stopping by today ... I love it when you do!


Friday, May 13, 2022

The Flower Challenge #68 - USE A NUMBER

Hello friends.  Playing along with The Flower Challenge where this month they are looking for a NUMBER on our flower cards.


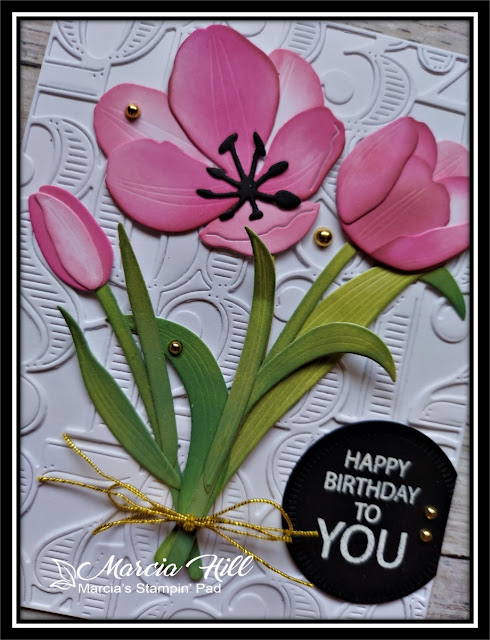
It's Tulip season and I've been seeing a lot of beautiful cards using The Greetery's BotaniCuts: Tulips Dies out there in blogland, and I kept thinking "why, oh why, did I never order that set?!"  So I went to The Greetery's website and put the dies in my shopping cart, and then hesitated...maybe I better look through my stash??  Yep, sure enough, I already had the dies!!  (Quit laughing Bobby!)  I can't be the only one out there with so many stamps and dies that I don't know what I even have anymore!!  Oh well, at least I checked this time before ordering, and the Tulips worked out perfectly for my numbered flower card.  Take a look...


Can you see my numbers in the background??  I used The Greetery's Delightful Digits Cover Plate Die for my background with a white on white look so my flowers would pop.  I die cut the Tulips out of white cardstock, and then ink blended using DOX inks in Peeled Paint, Rustic Wilderness, Worn Lipstick, Picked Raspberry, & Aged Mahogany.  


My sentiment was heat embossed in white on black cardstock and then die cut using the smallest Crimped Circle Dies (The Greetery), and the sentiment is from Gina K's It's All You.  I finished this card with a bit of WOS, a gold cord bow, and a few gold gems from PFS.

Lots and lots of beautiful inspiration from the DT for you to check out if you want to see how to use a number on your flower card...check it all out right HERE.  This challenge is open till the 25th at 5:00PM.

Thanks for stopping by today ... I love it when you do!


Tuesday, May 10, 2022

Double D Birds & Peace On Earth #15

Hello friends.  I'm combining one card for two challenges today...the Double D and the Peace On Earth.  The Double D challenge is looking for BIRDS and the Peace On Earth challenge is "Anything goes Christmas", so it was pretty easy to combine these 2.


Here's what I came up with combining the two challenges...


I used some Masking Magic (Gina K) to die cut the Cathedral Window (The Greetery), and then ink blended some light yellow to give a warm glow to the inside of church, followed by masking the light yellow so I could ink blend the blue for my outside.  Next I used my MISTI to stamp the pine branch from SU!'s Ornamental Pine onto my ink blended layer, followed by leaving the stamp in place in my MISTI, and stamping again on a white die cut Cathedral Window.  I was a little off on lining them up, but not too bad!


I stacked 3 of the die cut windows for some dimension and also added a piece of acetate to the back of the top die cut window.  (My plan at first was to make a shaker, but then I changed my mind.)  I did use some glue in the corners of each of the window panes, and then added glitter to make it look like snow piling up on the window.  I used an oldie but a goodie stamp set from PTI (Brushed Birds) for my two birdies and stamped them both in shades of red to give my card more of a Christmas feel as opposed to just a Winter card.  I thought about adding a sentiment to the outside, but decided to just stamp the inside and not clutter up the front.

The Peace On Earth Challenge is open till the 12th at 8:00PM, and the  Double D Challenge is open till the 15th at 8:00PM.  Lots of great inspiration at both sites, so check it out and play along.

Thanks for stopping by today ... I love it when you do!


Monday, May 9, 2022

Color Hues #40 - BLUE & TAN

Hello friends.  Playing along with the current Color Hues Challenge where they are looking for BLUE and TAN on our cards.


My birthday stash needs replenishing again already, and especially in the masculine department, so here's what I came up with using some of my favorite stamps, dies, & stencils...


I started with a kraft card base and then added a layer that I stenciled with PFS's Argyle stencil using kraft and blue inks.  Next I made my sentiment using Gina K's Birthday Trio Dies and ink blended the "HAPPY" using Blue Raspberry and In the Navy inks (Gina K) in an ombre pattern.


  I used CCC's Birthday Wishing stamp & die set for the bunny and balloon, and colored him in with my Copics (E31 & E23) and the balloon with a small blender brush.  I had to cover up a bit of the bunny's lower half to make room for the large sentiment, but I still think it came out pretty cute!  It may be a little juvenile for a masculine card, but I like it, so it's staying!

You can play along with this challenge HERE until the 14th, and don't forget to check out all the great inspiration from the talented DT too!!

Thanks for stopping by today ... I love it when you do!


Friday, May 6, 2022

Christmas Kickstart #62 - Mini Slimline

Hello friends.  Hope you didn't think I'd dropped off the face of the earth?!!  Just a little break as I was out of mojo and busy reading, knitting, & bingeing Netflix.  But I'm back and playing along with the Christmas Kickstart Challenge today, where they are looking for Mini Slimline cards.


Regular slimline cards are not my thing so much, but the mini slimline card size I absolutely LOVE, and have made quite a few!  I even have the measurements memorized for making envelopes to fit on my envelope punch board!  Last Fall I had bought a SSS Mini Slimline Snowflake Window stencil, and had not used it yet, so it was definitely time to pull it out for this challenge!!  Take a look...


I started by blending through the stencil onto white cardstock using Stormy Sky and Peacock Feathers Distress Inks, and then using Gina K's Master Layouts #7 dies to cut the stitched rectangle.  I mounted the stenciled layer onto a piece of 6 1/2" x 6 1/4" white cardstock, scored at 3 1/4" to create my mini slimline card base.


I die cut three times and stacked my sentiment from MB's Let It Snow Posh Script before adding it to the bottom of my card, and then finished with a few of Gina K's Disco Ball Sequins.  Pretty simple card, but I love the way it turned out!

Check out what Dot and her guest elf Arlene came up with for inspiration, and then play along right HERE to get a head start on those Christmas cards.  This challenge is open till the end of the month, so plenty of time to play!  And if you've never made a mini slimline card before, I think you'll get hooked, just like me!! 


Thanks for stopping by today ... I love it when you do!