Showing posts with label CAS Mix Up. Show all posts

Tuesday, August 25, 2026

CAS Christmas and CAS Mix Up August 2026

Hello friends.  Sharing a quick and easy card for both the CAS Christmas Challenge (Santa's Sleigh) and the CAS Mix Up Challenge (Stenciling over patterned paper).


And here's what I came up with using Cottage Cutz Vintage Horse & Sleigh and PTI's Spring Rain striped DSP that I stenciled snowflakes from The Greetery's Frosty Flakes Stencils.


I started by stenciling my snowflakes using residual ink from my blue blending brush onto the striped DSP, and then matted it with a piece of black cs. (Although you can't see it, I did add WOS to the stenciled snowflakes.) I die cut the Vintage Horse & Sleigh from black cs (twice for a little more stability) for a silhouette look and added it with foam strips to the DSP.


I added my stenciled DSP and sleigh to the upper portion of my white card base and then added the sentiment from PTI's In The Meadow stamp set below.  Very simple and quick & easy, but I love the way it turned out!  Lots of inspiration on both the CAS Christmas site and also the CAS Mix Up site.  These challenges are both open till Monday, August 31st.


Thanks for stopping by today ... I love it when you do!


Wednesday, July 15, 2026

CAS Mix Up July 2026 - ECLIPSE

Hello friends.  Playing along with the CAS Mix Up Challenge today where we are being asked to make a card using the ECLIPSE technique! 


Love this technique but haven't used it in quite awhile, so it was FUN to do!  Although I have to admit it wasn't fun in the beginning!  In fact my panel ended up in the trash until I dug it out the next day and decided maybe it wasn't so bad after all!  Haha!!  Take a look at how it ended up...


I started with TCW's Mini Joyful Sunflower stencil and inked it up, spritzed with water and then flipped it over and onto my card panel.  I pressed it with a paper towel and then lifted it off...it was a hot mess and didn't even look like a sunflower!  It was basically just an outline and a messy outline at that!  So I carefully replaced the stencil and ink blended in the openings of the stencil...apparently I didn't line it up close enough so it was off. Grrrrrr!!  Into the trash it went.


I pulled it out of the trash the next morning and thought maybe it wasn't so bad...just a little artsy.  I trimmed it down (started with a 6x6 panel and cut it to a 5 1/4 x 4) and then used an older Catherine Pooler Hello die down toward the bottom.  I die cut the hello 2 more times from white cardstock and then proceeded to fill it all in.  I backed the panel with a piece of PTI's Summer Sunrise cs and then added both to a white card base.  Considering the way this card started out, I'm really kinda pleased with the outcome! 

** Just realized I didn't include any stamping...oops!  Oh well, should have remembered that from before...will try harder next time to not forget!  Sorry!!

Loll and the DT have some FABULOUS inspiration for you using the Eclipse technique, and you can find it all right HERE.  This challenge is open till Friday, July 31st.


Thanks for stopping by today ... I love it when you do!


Tuesday, August 9, 2022

CAS Mix Up Aug. 2022 and Double D Lighthouse Challenges

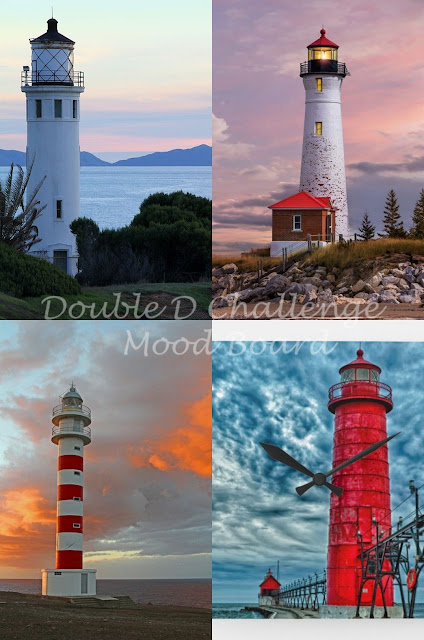
Hello friends.  Playing along with 2 favorite challenges today, and just gotta love it when you can combine both of them together!!  CAS Mix Up is looking for cards using the Emboss Resist technique, and the Double D Challenge is looking for Lighthouses.


Here's what I came up with...


Michigan where I live is surrounded by water, so plenty of lighthouses in my state!  I was born in Traverse City, close to the Old Mission Point Lighthouse, so figured it was a great time to dig out an older wooden stamp I have of this lighthouse. (Hardware Stampin')  I tried a new to me technique called Faux Batik which is also an emboss resist technique, and I love how it turned out!  I started by stamping my lighthouse in clear embossing powder, and then began ink blending 3 shades of blue ink onto the piece of heavy weight white cardstock.  (I think I was supposed to do this with the ink blending first and then embossing, but it still turned out!!)  I did some water splattering at this point too to add a little more interest.


At this point I started folding the cardstock at different angles from top to bottom with a bone folder, and then from side to side.  Next comes the fun with ink blending again over all the creased folds you made so they stand out, which gives you the Faux Batik look.  There is a video link on the CAS Mix Up site that shows how to do this, and also Loll explains beautifully in her post on how to do this technique also.  I die cut my image with a Gina K Master Layout #2 die, and then added a black layer before attaching to a white layer that I used a SU! embossing folder on (Old World Paper).  I added strips of foam tape behind the white embossed layer and added to a top folding white card base.  

LOTS of BEAUTIFUL examples of the Emboss Resist technique from the DT at the CAS Mix Up site, and also lots and lots of FABULOUS Lighthouses over at the Double D challenge, so check them both out and play along!  

Thanks for stopping by today ... I love it when you do!


Monday, July 11, 2022

CAS Mix Up July 2022 - Things with Wings

Hello friends.  I'm playing along with the CAS Mix Up Challenge today and they are looking for WATER COLORING and Things with Wings.


I had just received The Greetery's Jumbo Curiosity Dragonfly die and this challenge seemed like the perfect time to try it out!  The die comes with a stencil too, but since the main element of this challenge needs to be water coloring, I didn't use the stencil.  I used Lindy's Magicals for my water coloring and came up with this...


I used Tibetan Poppy Teal and Ponderosa Pines Olive Magicals (from the Autumn Leaves set) and sprinkled both colors on my cardstock and then spritzed lightly with water.  Once it was dry I used the Dragonfly dies to cut him out.


I tried so hard to capture the shimmer you get from using Lindy's Magicals, but my camera just wasn't having any part of it...sorry!!  On my card base I ink blended a bit of turquoise ink leftover on my blending brush before adding a top layer that I had used MFT's Peek-A-Boo Rectangle die on and then SU!'s Timeworn Type 3D embossing folder.  I added a few green crystal gems (PFS) to the body of my Dragonfly before gluing him down to the center of the rectangle, leaving the two bottom wings curled up a bit for some dimension.


I didn't add a sentiment as I really liked the CAS look with nothing else added.  I'm thinking this will be a good "Just A Note" card.  :0)

The DT has some absolutely BEAUTIFUL cards to inspire you with, so check it out right HERE and then play along!  This challenge is open till the 24th.

Thanks for stopping by today ... I love it when you do!


Tuesday, June 14, 2022

June CAS Mix Up Challenge

Hello friends.  The CAS Mix Up Challenge is back and I am SO happy!  Loll is hosting this month's challenge and she would like to see us use pastes or gels through a STENCIL on our CAS cards.


I had FUN with this one using an older Gina K stencil (Snowflake Mandala) and NOT making it a Christmas card.  Take a look...


Rather than the blues and turquoises I usually use with this stencil, I blended rainbow inks (Gina K inks) on an angle starting at the top left through the stencil.  Leaving the stencil in place, I said a quick prayer that my Glass Bead Gel would still be good (it was getting a bit stiff so I nuked it for 10 seconds and said another prayer, and it worked!!) and worked quickly to spread it over the stencil and ink blended piece.  I removed the stencil (and washed it right away...a MUST do!!) and then of course the hard part of waiting for it to dry!


Once my layer was dry, I trimmed it down just a bit (4" x 5 1/4") and adhered it to a top folding white card base.  For my sentiment I used Honey Bee's Bitty Buzzwords stamps and dies to die cut the word "hugs" and emboss in white on a black strip the words "SENDING YOU".  I used a little bit of foam tape behind the sentiment strip for a little dimension, and the card was done.  My colors are a bit brighter in my photos than they are in real life...they're more pastel and soft, and I'm really pleased with the way this card came out!  It will definitely brighten up someone's day!!

Make sure you check out all the FABULOUS inspiration from the DT right HERE and then play along...this challenge is open till the 24th.

Thanks for stopping by today ... I love it when you do!


Monday, February 21, 2022

CAS Mix Up Feb. 2022 - Faux Cloisonne

Hello friends.  Playing along with the CAS Mix Up Challenge where this month they are looking for CAS cards using the Faux Cloisonne technique.


Susan is hosting this challenge and she gave the idea of using photos from a glossy magazine as the background before you emboss, and this idea intrigued me, so looking through my magazines I went!!  I found a few photos I thought would work and the one I ended up liking the best was using a photo of knitting needles from a Knitpics catalog.  Here's what I came up with:


I used a shell stamp from Gina K's By The Sea 2 and inked up the stamp with versamark onto the glossy print and then added my gold embossing powder and heated it up.  You'd never know that the background was knitting needles, would you?!!  Because the glossy paper in magazines is rather flimsy, I adhered the shell to a piece of card stock and then fussy cut the image out.  


 The rest of my card was rather simple to put together.  I stenciled a background piece using PTI's Sun & Surf  Stencil Collection using turquoise and green inks (Gina K), and then layered a panel that I die cut with MFT's Peek-a-Boo Rectangle Die over the stenciling.  My sentiment was embossed in the same gold as the shell and also comes from the By The Sea 2 stamp set.  The shell and the sentiment strip were both pop dotted for some dimension.  Easy peasy and I'm really happy with the way it turned out!  And I will definitely be looking at magazines differently now...thanks Susan!!

This challenge is only open till the 24th, but well worth checking out if you're looking for something new and fun to try out!  Susan and the DT have some amazing examples to share with you HERE to get you inspired to play along.

Thanks for stopping by today ... I love it when you do!


Monday, January 24, 2022

CAS Mix Up Jan. 2022 - Loose Watercoloring

Hello friends.  I'm checking in late again (seems to be my norm lately...grrrrrr!!), but did want to play along with the CAS Mix Up Challenge before it ends later today.  Jenny is hosting this month's challenge and she would like to see us use LOOSE WATERCOLORING on our CAS cards.


I have a very quick and easy card to share with you using VERY loose water coloring...


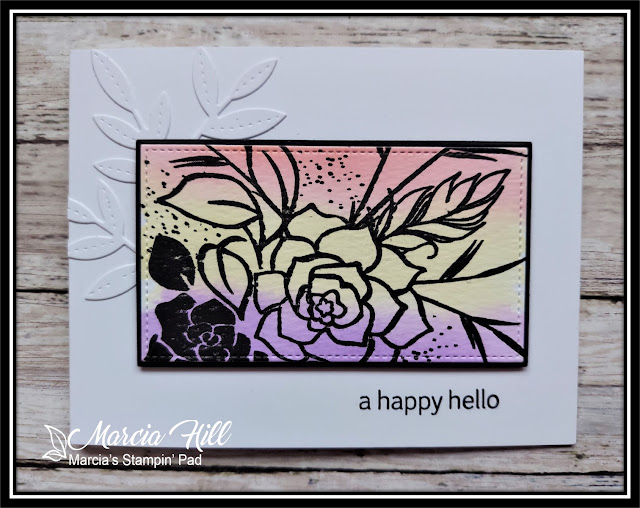
I started with a piece of TH watercolor paper and quite liberally wet the cardstock before swiping Fired Brick, Mustard Seed & Wilted Violet Distress Inks across it.  Because of all the water, the colors are quite muted, but I love the soft look.  


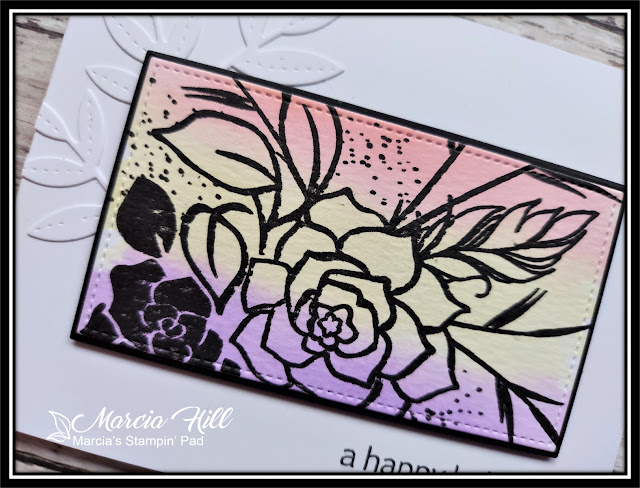
I used a large Gina K stamp (Just A Little) and stamped with black ink over my water coloring, and then used a stitched rectangle die (also Gina K - Master Layouts 2) to die cut just a portion of my  image.  I layered it with a black mat and then popped it up with foam tape before adhering it to a white card base.  I also added a leaf die cut from PTI (Songbird) in white to my white card base to give a bit of design to all the white surrounding the water-colored image, and the sentiment is from the Just A Little stamp set.  As I mentioned before, it's a very simple card, but it almost reminds me of stained glass and I'm really happy with the way this card came out!

I've been beating myself up this month for my lack of mojo, but after finishing this card, I realized I don't have a lack of mojo at all...it's a lack of energy!  I'd rather just sit and read or knit!  It is Winter though, and I've got the hibernating act down to a t!  Facebook told me yesterday that it's only 60 more days till Spring though, so there's light at the end of the tunnel and I'm ready!!  If you're in the same place I am, hang in there...we'll get through this!!  :0)  

Thanks for stopping by today ... I love it when you do!


Monday, November 8, 2021

CAS Mix Up Nov. 2021 Stencil Challenge

Hello friends.  I'm playing along with the lovely Loll and the CAS Mix Up team for this months challenge, and Loll would like us to use the STENCIL MONOPRINT technique on our cards.


I was SO excited when I saw this challenge as I absolutely LOVE doing this technique!  I pulled out one of my favorite snowflake stencils by Gina K called Snowflake Mandala and came up with this card...


I started by inking up my stencil with Salty Ocean, Salvaged Patina, & Peacock Feathers Distress Inks, and then spritzed quite liberally with water before pressing into my water color cardstock.  I laid a piece of paper towel over the stencil and then set my laptop on top of it and left for 15 minutes!  I always love the big reveal when you lift everything off and see the results, and I may have squealed a bit when I saw how this one turned out!  Haha!!  Once it was dry I cut down a portion of it and mounted it to a piece of white cs that I had die cut using Spellbinders Hemstitch Frame Die.  


  I wanted to put a piece of colored cardstock behind my die cut panel, but couldn't find a blue that matched what I had come up with on my monoprint, so I got my Distress Inks out again and made my own matching colored cardstock...I love the perfect match!  I finished this simple card with a die cut sentiment using MB's Let it Snow Posh Script and die cutting it from vellum for the bottom layer and a holographic cardstock (Recollections) for the top layer.  It really sparkles and shines in real life!!  

Check out what Loll and the DT came up with using this wonderful technique (they also have a couple video links in case you've never tried this technique before), and then play along right HERE.  This challenge is open till the 24th.

Thanks for stopping by today ... I love it when you do!


Wednesday, October 20, 2021

CAS Mix Up Oct. 2021 - BOTANICAL PRINTS

Hello friends.  Playing along with the CAS Mix Up Challenge where this month the hostess Bonnie is challenging us to get out in nature (I walked into my front yard!) and collect some leaves to make BOTANICAL PRINTS with.  If you've never tried this technique, Bonnie has some great video links listed on the site to help you out.


I snipped off one of my Boston Fern leaf fronds, a leaf from one of my Hostas, and a collection of different colored leaves from our Maple tree.  The Boston Fern one turned out ok, the Hosta leaf just made a gooey mess, and the Maple leaves turned out pretty good.  Here's what I ended up with before turning them into cards...


And here's the 3 finished cards I ended up with...


I added Distress Ink to my leaves before putting them through my Big Shot, and this was from the 2nd pull, as there was still ink left on them after the 1st pull...I just spritzed with a bit of water and then ran them through my Big Shot again.  A much softer and muted result, but I like how it turned out!


 You can see the embossed lines from the actual leaves better in this close up.  My sentiment is from The Greetery's Bittersweet Bouquet.


I think this one turned out to be my favorite, even though I wasn't too impressed after I pulled it out of my Big Shot and peeled the frond off the cardstock.  It tore the cardstock in some places and that bugged me, but after it had dried out and I placed it in an embossing folder (SU!'s Time Worn), I really liked the CAS look it had.  I simply matted this one with some black and a white card base, and then added my die cut sentiment from Memory Box's Just A Note Posh Script that I popped up with some foam tape.


My last card uses the 1st pull from the painted Maple leaves...


Adding the ink to the leaves definitely adds a brighter look to the leaves after pressing them through the Big Shot, and I do like the look, although I like the muted shades of the first two cards much better!  


I finished up this card with a strip of embossed Pumpkin Pie cs (SU!) that I used a SSS 3D Falling Leaves embossing folder on, a bit of twine, and a sentiment from Clearly Besotted's Autumn Flowers.

The DT has outdone themselves this month with all their BEAUTIFUL Botanical Prints, so make sure you check out their inspiration, and then play along right HERE.  This challenge is open till the 24th.


Thanks for stopping by today ... I love it when you do!


Monday, September 20, 2021

CAS Mix Up September Watercolor Challenge

Hello friends.  I'm playing along with the ladies over at the CAS Mix Up Challenge where they're looking for WATER COLORING and AUTUMN COLORS.


I have two cards to share with you today because I couldn't decide which one I liked better!!  Let's start with my easy peasy one first...


This technique is SO easy but I love how it looks!  You simply ink up an acrylic block (any shape or size) with your ink cubes, and then spritz with water before pressing (gently) into your cardstock.  I used Red Velvet, Tangerine Twist, & Wild Dandelion inks (Gina K), and I just love the way the colors blended into each other after adding the water.  Here's a closer up:


My red almost looks pink after being watered down a bit and I love how it blends so beautifully into the orange, and then how the orange blends into the yellow!  Once it was dry, I used a leaf stamp (Gina K's Autumn Silhouettes) and black ink to stamp the image, and also stamped the sentiment in the black ink (Gina K's The Best Flowers).  I matted this layer to a piece of black and then adhered both to a piece of white card embossed with a SSS Fall Foliage EF.  A white top folding card base and a bit of black & white bakers twine finished up this simple card that definitely says AUTUMN to me!

My 2nd card uses a MFT image from Fall Friends and a background using Lindy's Magicals.  Take a look...


  I started with a heavy piece of cardstock and used Red Hot Poker Orange and Screamin' Banshee Black Lindy's Magicals and water to create my background and then set it aside to dry.  Next I stamped my MFT image in black and then heat embossed in clear, and then water colored using an Aqua Painter brush and SU! ink pads.  Don't have the die for this sweet little gal sitting on her pumpkin, so had to fussy cut her out.  I used a couple oval dies to create my opening for my background, and also used SU!'s Subtle EF for my top layer.  Here's a close up so you can see the background and my water coloring a bit better:


I think water coloring is a perfect medium for Autumn, and definitely need to do more of it!!  My dad was so talented with water colors, and I so wish he were still around to see what I'm up to now...he would have loved it!!  I finished my card by pop dotting the little girl over the Magicals background, and then added a sentiment from the Fall Friends stamp set that I heat embossed in white on a black strip.  

Lots of BEAUTIFUL cards from the DT if you need more inspiration...you can check it all out and play along right HERE.  This challenge is open till the 24th 

 
                                   Thanks for stopping by today ... I love it when you do!